Easy Place Value Activity

As I said in the previous post, I attended a great math training in my district.  Another great activity the presenters shared was made with craft sticks.  It is  super easy to make and it can be adapted to meet the different needs of students in your room.

Materials needed:

Up to 10 craft sticks per student and different colored permanent markers

Here is a picture of the stick when it is finished. One side has one dot in the middle. The other side has 10 dots split into 5 and 5.


math craft sticks

This is how you can start the activity. Then you can adapt it in different ways to practice multiple math skills.

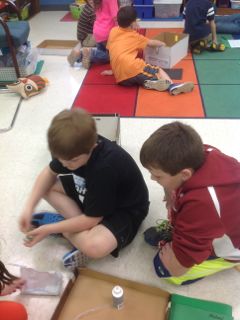
I started my 2nd graders with 5 sticks each. The students hold the 5 sticks in their fist, place their fist on the table and release the sticks.  Then without flipping any of them over, they count how many dots landed face up.  I walked around to see if any had trouble counting by 10s and 1’s.  They write down their number and share their number with the group. The one with the highest number wins that round.  You can change it to the one with the highest or lowest wins.  They continue playing for four rounds. Then a new game starts.

Extensions I have tried:

  • The group can write down the numbers for 1 round and organize them from least to greatest or least to greatest.
  • Students can stop after 2 rounds, add their two numbers to find the total.
  • The groups can add up each round to see how many dots the entire group had in one drop of the sticks. They can check their answer by using the sticks to verify their answer.
  • You can add more sticks to students who need higher numbers and remove sticks for those that need smaller numbers.
  • It is a great way to see if students can count by 5’s, 10’s and 1’s. If students do well counting with 10’s and 1’s then ask them if they can count them by 5’s and 1’s.
  • Ask students how they know they have more than another student.  This will help them practice comparison.
  • You can have students record 2 rounds and then use greater than, less than and equal signs to compare the 2 totals.

There are so many more ways you can use this activity. The best thing is the kids love it.

Here is a very short video of one group combining all of their craft sticks to find the group’s total. In each group of 4, there was a captain who was in charge of staying “sticks up/sticks down/release” and also recorded the group’s total. After each game the captain changed so everyone had a chance to record but everyone in the group was responsible for verifying the answer each time.

Game

Answer in written form

Finding the total

Verifying with the sticks

These take very little time to make and can be used for so many math concepts. 🙂

Have fun!


**I would give you this advice.  Get a plastic bag for each group. Choose 4 different colors and make sets of sticks for 4 students. Then place these in a plastic bag.  This will help students sort the sticks after each release. 🙂

Disclaimer: I googled this activity when I left the workshop and while I found several teachers who were playing it, no one seemed to know who created it. 🙂  It seems to be an activity that just gets passed on by word of mouth. 🙂  So I will join in with sharing it because it is a GREAT activity.


Stand Up and Be Counted

The power of counting collections

I recently attended 3 days of district professional development on math.  I learned tons but I want to write about one activity that I reached all my students and also provided valuable insights into my students’ mathematical understanding.

We read this article on Counting Collections. After reading this article, I was intrigued and wanted to try it with my students. Most elementary classrooms have  materials on hand to do a counting collection activity.  I went through all my math manipulatives and also pulled out school supplies that I had in the cabinet.  I used the following materials: dominoes, counting bears, interlocking cubes, 2 sided-counters, paperclips, game tokens, beads, pattern blocks,  and craft sticks.  I had several different types of game tokens and beads. I had 12 different collections. They were going to work in  pairs and I wanted all pairs to have many collections to choose from.

What I didn’t realize was how much this activity would show me. I expected most of the pairs to automatically count the objects by tens. I thought some might even count by 20’s.  As I walked around observing students, many pairs counted by ones. BY ONES!!!  I did have pairs organize in fives and tens but not as many as I thought I would have.  I was also amazed that some groups decided to organize by other attributes such as color. So they would have piles of 8, 11, 4, 6, 15. When I asked them how many they had counted so far, they realized it was difficult to add them but continued with this strategy. I also saw strong math students struggle keeping up counting by 2’s past 32. They were GREAT until around 30 but then they would skip numbers. They would say, “30, 32, 36, 38….time passed…40, 42”  It was worse when they counted over 100.

I think kids need to count real objects more often. Students count a lot in kindergarten but then many move on.  I found that many students were great until their collection went over 100. Then everything fell apart.  This is caused from everyone stopping the count at 100 every time.  How many times do we count to 100 by 2’s, 5’s, & 10’s but never go past it?  Kids shout “100!” when they reach it because they think it ends it all. 🙂

If you would like to try a counting collection, I would make these suggestions:

  • Read the article about counting collections.
  • Gather lots of different collections so students have choices.
  • Provide paper for students to record their work.
  • Make a simple form to write observations. I had a form but needed a LOT more to record notes.
  • DO NOT SUGGEST A WAY TO COUNT. In other words, do not say “What if you counted by tens?”  You can ask “Could you try another way to count the objects?” But then walk away!  Let them struggle a bit and think of a way to make the counting easier. You can ask them to walk around the room and ask other groups how they are counting if they are really stuck.
  • Make large collections that will require more than one math session or counting time.  One important part of the task is being able to organize what they have counted, record what they have counted and also what is left to count.  I had plastic storage bags and sharpies out if they needed them. (The funny thing was many just made 2 bags: counted and uncounted but they didn’t record the number in each. The next day, they had to start ALL over but they didn’t make that mistake the next day.)

What do look for:

  • How do they organize the counted and uncounted objects?
  • Do they have a strategy to count? Did they make a plan?
  • How are they counting? Is it random? Did they choose to count by 1’s, 2’s, 5’s, or 10’s?  If they counted by 10’s how did they get to ten? Counting by 1’s, or 2’s to make 10?
  • When you come by and ask them to count for you, can they each count the collection? I noticed some pairs had one student who could count the collection but the other student could not. When they finished counting, I asked them to rearrange with a different number (easier) to verify the total. This gave support to the one who struggled and stretched the other student to work with a different strategy.
  • If they are counting by 1’s, interrupt them with questions about other things. Then ask them how many they have. Most of the time, they will forget because it is a not an organized plan and is a poor strategy for such a large number. Once you do that a few times, I ask “I am so sorry. I keep interrupting you. Could you organize these in a way so that if I come by, you can find your count again quickly?”  They usually move to more efficient strategies.
  • When they find a total, ask them to record how they counted and to show their count in some way.  Then ask them to verify the total by counting in a different way.  When I asked them if they would get a different answer, some said “Yes,” but most said, “It will look different but it will be the same number.”
  • Just take time to sit and listen to them count.  They will amaze you and you will also find gaps in their understanding.  Many students struggled over 100, then again over 200.  Most did well counting by 10’s but when they had to verify the total by counting by a different number, I discovered areas we needed to work on.  I don’t think we do enough of just sitting and listening to our students.  You need to ask lots of questions. 🙂
  • Some questions: How are you counting your collection? Why did you choose that strategy? How many do you have now? Looking at how many you have left, what do you think the total will be? Do you think it will be over ____?  How are you going to show what you have done so far on your paper? Can you make it clear to anyone how you counted your collection?

Here are some pictures from our first counting collection activity.  My students LOVED it. One day we had inside recess and I gave them tons of choices. They ALL chose counting collections. I was amazed. 🙂


IMG_0856IMG_0859

IMG_1934


IMG_1935


IMG_1937

IMG_0860


Check out this article about counting circles in middle school. It is another math routine involving counting.  It just shows that counting is powerful and important at any level!

What’s New at the Zoo? part 5

In case you missed the first 4 posts…Click here for part 1part 2, part 3 and part 4.

Ready for group work!

After hearing each group member’s letter, the group decided on one animal. The researcher of the chosen animal became the group’s expert.  The research was completed so now all the groups had to focus on was thinking of four opinions why the zoo should choose their animal. They also had to provide reasons to back up each opinion.  Here is the group form that the group used to organize their thoughts.  When finished each group met with me to review. Once they were cleared, they went back to assign each member a job to do in the presentation. Some of the jobs the groups created were: fact checker, presentation designer, photo manager, and captain. We used the Explain Everything app for this presentation.  The groups found lots of pictures of their animal and worked very hard trying different layouts for the slides. They made final edits on the script for their presentation and then recorded.  I was proud to see how much they cared about the project. Some students took 5 or 6 tries before they were happy with their final recording.

Here are their final presentations for the zoo!  The zoo will choose one animal from the presentations. We are waiting for their final choice. Once we know the final animal, each group will design a zoo exhibit for it. 🙂

Click the links below to view each group’s presentation! 🙂 I am so proud of their hard work.

Snow Leopard

Mountain Lion

Feather-Tailed Glider

Lynx

Bat-Eared Fox

Part 6 will focus on designing the zoo exhibits.

What’s New at the Zoo? part 4

In case you missed the first 3 posts. Click here for part 1, part 2, and part 3.

Here’s my favorite part of teaching with project-based learning: THE SURPRISES!

This is only my 2nd project-based learning unit but I am amazed at how many content standards are covered beyond the ones I chose as the focus skills.

Because of one student’s research we ended up doing this!

IMG_0538


So are you wondering what animal he was researching?  It all started out with the Black Mamba.  One of my students loves snakes.  He chose the Black Mamba as his research animal.  If you decide to try something like this be prepared to hear “Did you know…?” MANY times but it made me so happy to hear it. They were so excited about all they were learning and they just wanted to share.  One morning he came up to me with a book and said, “Miss Mac, did you know that the Black Mamba is 8-10 feet long?”  I did not know that so I asked him how long that was. He held his hands out about 3 feet.  I grabbed a yardstick and we reviewed how long a yard was and then he realized his snake was much longer than he assumed.  So I told him to go figure out how long it really would be.

IMG_0477This was a great unexpected lesson in measuring an object that is longer than the measuring tool. He asked  a friend to help.  This of course grabbed the rest of the classes’ attention.  Once they measured 8-10 feet, they laid down by it to show it was bigger than 2 of them!

IMG_0488


By this time, my principal walked in.  She told a story of a middle school student who told her she could not measure paper for some tables because the yardstick wasn’t long enough. 🙂  She was bragging  on my students for outwitting a middle school student. She knighted one of my students as “Sir Measurement.”

IMG_0489


Of course my students loved this! 🙂 Who wouldn’t want to be “Sir Measurement?”

My principal stayed for a few minutes to talk to me about what they were learning but also about something totally unrelated to this activity.  When she left, I looked up and this was happening. (The picture was taken after they finished with it.)

IMG_0490


I asked them what they were doing and they said, “Morgan told us that the Anaconda can be between 25-30 feet long so we want to see how long that snake would be!” They really didn’t have room to do this well in my room so I told them we would take up their “cube snake” and take it to the school lobby to check for an accurate measurement.

I thought this is  PERFECT chance to practice using yardsticks, meter sticks and measuring tapes.  It is a CCRS (Alabama’s version of Common Core) standard and one that I still needed to cover.  We head off to the lobby to rebuild the snake. We took turns measuring with the different tools. They learned you have to be careful with each tool and look for zero and also where one ended.

IMG_0535IMG_0529IMG_0536


The final measurement unit was the most fun.  We wanted to see how many 2nd graders it would take to match the anaconda.  I took my tallest and my shortest student and stood them side by side and asked “Is there a problem if we use random students in our class?” They decided we couldn’t do that so one student said, “We need kids about the same size!” The lined themselves up in groups around the same size. We used the group in the middle that had the most kids in it.  We used them to measure the “snake.”  And that takes us back to our first photo!

IMG_0538


Did I plan on practicing measurement when I planned this unit? NO! Did it fit BEAUTIFULLY? YES!  It was a GREAT way to practice our measurement skills in the context of our animal research and they LOVED it!

Part 5 will be about their group presentations.

What’s New at the Zoo? part 3

Here is the part 1  and part 2 if you missed the previous posts.

I teach 2nd grade. Research is a new concept/skill for them.  I decided to have my students do a lot of their research during reading groups on ipads.  I did this for many reasons.  The best reason is that they were reading and writing the entire time. In fact, most were encountering vocabulary much higher than their current reading level. Being in small groups allowed me to meet individual needs. We learned LOTS of vocabulary and were able to practice using nonfiction text features.  I could also help them search safely and model which sites to trust and which ones would need verification.  These are all skills that they need to learn. They have information at their fingertips but do not always know how to navigate through it all. Here is the research form I created using their list. (see part 2).

IMG_0472

IMG_0491

As I said earlier we learned lots of new vocabulary.  We found that we encountered the same vocabulary on almost every animal site. Here is a picture of a chart we created after a class discussion on what were learning by researching animals.

IMG_0509


These are AMAZING vocabulary words. I found that my 2nd graders confused the term endangered with dangerous.  They thought they meant the same. Through research and discussions in small groups, we discovered the meaning of both.

Once the students finished their individual research, they created a nonfiction magazine article for our class magazine on animals.  They will use Publisher to design their magazine article. We used magazines in our room as models for layout designs. If you don’t have time for a magazine, you could always use Haiku Deck , Educreations, or any other creative app or website. The magazine articles continue throughout the project.  Once the research was completed, we moved to the group part of the project but students continued working on their individual magazine articles. This is separate from the group project. 🙂

They also began thinking about reasons why the zoo should choose their animal.

One important side note:  I knew I wanted this project to focus on science, writing and speaking standards. With the new CCRS (Alabama’s version of Common Core standards), students are expected to state an opinion and provide reasons for that opinion.  I asked our reading coach to model the new Lucy Calkin’s unit on writing opinions during our writing block.  She and I co-taught the lessons. Once we taught the first introductory lessons on writing opinions about favorite books, we moved the students to using the strategies with their animals.  You do not have to use Lucy Calkins’ lessons but you will need to teach your students how to write an opinion with reasons to support it.

Writing an opinion beyond “because it’s cool” is hard for 2nd graders.  I had to ask really good questions to help them think about the animal with the zoo in mind.  Example: They would say, “The zoo should choose this animal because it’s so cute.” I would ask: “And why would the zoo want a cute animal?” They would say, “Because it’s cute.” and I would say “But how would this help the zoo?” They would eventually come up with a good reason such as “OH…people like to see cute animals so more people will come to the zoo!”  Don’t give up and tell them. Just keep asking good questions! 🙂

Once the research was finished (or mostly finished for some), the students wrote a letter to their group. In the letter they wrote why their animal would be a good addition to the zoo and give reasons for this opinion.  Each person in the group would share their letters to try to convince the group that their animal was the best for the zoo. The group choose 1 animal and then begin working on a presentation about that animal for the zoo.  Did they all want their animal chosen? OF COURSE! But this is a good lesson in itself. Every student’s animal will be featured in the magazine article but only one will be the focus of the presentation.

Here is an example of one of their opinion letters:

IMG_0570


In case you can’t read it. Her letter says: (spelling corrected in typed version 🙂  )

Dear Group,

You should pick my animal because it is a very unusual animal! And it’s very cute. It’s not endangered but you can barely find them. They have lots of special features to survive and it might be fun to watch and they’re the most… (I didn’t take a picture of the back but she introduced her animal and talked about the special features of her animal.)

So we went from 19 animals to 5- one for each group.  I was going to write about the fun rabbit trail here but this post was longer than anticipated. 🙂  I will write about it on the next post.

By the way, the letter above won over her team but just barely.  🙂 They all wrote very convincing letters!

Here are other examples of their letters:

IMG_0573IMG_0572IMG_0571


Part 4 is about the fun surprises that happen in project-based learning!

What’s New at the Zoo? Part 2

Here is the part 1 if you missed it.

I meant to write part 2 right after part 1 but you know how it goes in the world of teaching and life. Things just get busy. The project has continued on and has gone very well because it was so engaging for the students.

Luckily, I have a friend, Roger Torbert (@ZooEducation),  who is the Zoo’s Vice President of Education. He agreed to be a part of our project and has been very helpful! I talked to my principal and asked if it was okay for him to write her a letter asking for help from a class at our school.  The good news for anyone who is interested in this pbl unit, zoos are very helpful.  I have another friend,  Louise Morgan (@MrsMorgansClass ), who is doing this pbl unit too. She contacted her local zoo in Texas and the zoo’s educational director LOVED the idea. They are helping her as well.

Here is the letter my friend wrote.

zoo3


In case you can’t read the letter (I have tried to upload a clear copy 4 times.), it essentially asks for a class or grade level to recommend an animal that they zoo does not already have. They can research animals and then make their recommendations from their research.

This kick-started our project ( entry event)  and the class was SUPER excited about studying animals. They were even more interested because there was a purpose behind the research.

We came up with the driving question from the letter.

Driving Question:  In your opinion, which animal should the Birmingham Zoo choose as its next animal? 

After posting the driving question, we discussed what we would need to know and what would the zoo want to know about the chosen animal.  Here is the list the students decided would be important to know about the animal:

  • habitat
  • diet
  • size
  • animal group
  • predator/prey
  • did it live alone or in a group
  • would the zoo need to build an exhibit or do they already have a place for the animal

I told the students I would use their list to create a research document to help them with their research.

Meanwhile, I researched a lot of zoos that had kid-oriented websites and that had informational links about the zoo’s animals.  I put all of these links on our kidblog. Here is the link to the post I created to help with the start of their research.  I also printed out a list of the animals at the Birmingham Zoo. I found the animal list on their website.  I also collected lots of animal books and placed them in a basket to be used for research.

I gave the students a beginning research page to help narrow the choices but not have them pick the first animal they read about.  I asked them to find 10 animals from the zoo websites or from the animal books.  The first thing they had to do was check the Birmingham Zoo animal list. If the zoo had it, they had to find another animal.  Here is the link to this first research page.

The students devoured the zoo websites and books.  They found 10 animals they loved and then each student had the hard task to just choose one to research.

Part 3 will be about their individual research and also about the totally fun standard-filled rabbit trails that happen in project-based learning.


What’s New at the Zoo? part 1

Last year, my team and our enrichment teacher created this unit that would combine our science standards on animals with our new standards in writing. BUT I had only read about project-based learning and was a little nervous to try it.  After completing my first pbl unit , I was ready to try another one with my class.  I loved what it did for my students!

Project Overview: We will collaborate with the local zoo.  The zoo will write a letter to the class asking for their help in choosing the next animal for the zoo.  The students need to find an animal not currently at the zoo and research this animal focusing on the animal group, behavior, size and body covering along with diet and range.  The students will write a nonfiction article about their animal. The students will then be put in groups. The groups will choose one of their researched animals as the group’s animal. The group will create a presentation stating their opinions why that is the best animal for the zoo.  They will also provide reasons for their opinions.  The zoo will choose one animal from the five groups. Then the groups will design an zoo exhibit/enclosure for that one animal. The exhibit will need to meet the needs of the zoo and the animal.

Driving Question:  In your opinion, which animal should the Birmingham Zoo choose as its next animal? 

Here are the content standards that will be covered in this unit:

Science:
Identify characteristics of animals, including behavior, size, and body covering
Writing 2.1
Write opinion pieces in which they introduce the topic or book they are writing about, state an opinion, supply reasons that support the opinion, use linking words (e.g.,because, and, also) to connect opinion and reasons, and provide a concluding statement or section.
Writing 2.2
Write informative/explanatory texts in which they introduce a topic, use facts and definitions to develop points, and provide a concluding statement or section.
I know students love studying animals so this will be a high interest unit for them.   A field trip to the zoo was planned in the middle of this unit. This will allow students to look at exhibits while learning about animals.
Part 2 will focus on the beginning of the project and an extra learning event that just happened.  This is why I love pbl. The students take it in directions you never planned but it helped  me cover even more standards. It happened naturally and was student led.

What I learned while my students learned…

I finished my first project-based learning unit, “Who’s Afraid of the Big, Bad Wolf?” two weeks ago.  Here are some of the skills my students learned during this project:

  • Wind is  a force and you can make build in a way to make something wind-resistant.
  • Architects use different roof designs to help with wind resistance.
  • We are better working together. It may be a challenge but it is very beneficial.
  • An estimation is not always accurate.
  • You need to re-evaluate a plan and make it better if you are not getting the results you want.
  • The cost of building a house, even a pretend one, adds up quickly.
  • There are many ways to solve difficult math problems.
  • How to add numbers within a thousand
  • Adding multiples
  • How to add 3 or more two-digit numbers
  • You can manipulate the numbers to get friendly numbers. This makes problems easier to solve.
  • You don’t always have to know how to do something before you try it.
  • How to write a persuasively
  • To be persuasive, you need to show passion behind what you are saying.
  • How to speak clearly and share information
  • A real-estate agent works hard to persuade buyers. They use very descriptive words to help sell a house.
  • Projects are more fun when you are creative and open to new ideas.
  • You may have to rewrite many times before you are happy to call it the final draft.
  • Everyone needs to feel valued in the group or they will live up to that expectation.
  • If the learning is exciting, no one has to convince you to keep working.
  • My idea is not always the best idea. Even if it is, it may not be chosen by my team.
  • We can’t all win. The 3 pigs liked all the houses but only one was the best fit for them.  I can handle that even if I worked hard. I can still be proud of my work.
  • How to write a summary

Ironically, what I learned from my first attempt of pbl is very similar.

I learned:

  • My estimation of how much time the project would take was a little off but I could make it work in the end because I saw value in what they were learning.
  • They can do things I have not taught them. Because I gave an open problem, it allowed them to learn things in a meaningful way and it belongs to them and not to me. Isn’t this what I want?
  • Excitement and passion are contagious. Sometimes, I was the one who was super passionate about the parts of the project and it spread to them. Most of the time, it started with them.
  • They didn’t mind rewriting or rebuilding because they had a goal in mind. The driving question gave them a goal that they wanted to reach.  I didn’t have to tell them  that they needed to go back to rewrite their presentation or rebuild their house. They knew it on their own.
  • Just because I haven’t taught a pbl unit before, it did not stop me from trying it.  And I LOVED it.  I didn’t have official training on how to develop a pbl unit nor did I attend a workshop.  I read blog posts, read the book PBL in the Elementary Grades from Buick Institute, talked to others on twitter, attended chats, and finally just stepped out there! I did ask for help from those who have taught them before but you just have to try it!
  • We are better together.  It was nice to have another teacher do the project with me. @LesaHaney’s class joined ours. It was great to have someone walk on the journey together, especially since it was untraveled territory for me.

While this was my first project-based learning unit, it will not be my last. In fact, we are already in another one.  🙂

Who’s Afraid of the Big, Bad Wolf? part 5-final post in series

I wrote several posts about my first adventure into project-based learning.  In case you missed them- Part 1, click here;  Part 2, click here, Part 3, click here, Part 4, click here.

Our driving question changed at this point.  Since the houses were built, it was time for the Three Pigs to check them out. So here was our new question:

How can we market our house to persuade the Three Little Pigs to buy our house?

I invited a real estate friend to come to our classroom. She talked about how she markets a house. She shared that location and certain features can help sell a house. She also shared flyers she made for different houses. Then each group met with the real estate agent to discuss the best selling features of their house. The groups realized that choosing interesting adjectives could help in their presentations. They learned vocabulary such as A-frame, open floor plan, airy, and modern. The groups took notes as the real estate agent shared high points of each house.

IMG_0426


After meeting with the real estate agent, the groups divided the house information into 4 sections: address, materials, wind test and contact information.  Each member of the group had to write the needed information with the Three Pigs in mind.  They also had to turn this information into a commercial. We used the app Educreations to make commercials for each house.

IMG_0428

Here is an example of their writing drafts:

Persuasive Writing


Click here to see one of their commercials. Each group also made a real estate flyer that had to have the same information as the presentation.

Here is one of the house flyers:

Screen Shot 2014-03-07 at 8.18.33 PM

We also practiced our presentations with another real estate agent via Facetime. He gave us tips to make the presentations better.

We also skyped with our friends in Texas. They did the project with us. Each group shared the house they created.

FacetimepicIMG_0434


THE BIG DAY finally arrived! The Three Little Pigs came to our classroom to see the homes and hear the presentations. (A big thank you goes out to my assistant principal, Mrs. Stacey Stocks, and our enrichment teachers, Mrs. Mandy Fox and Mrs. Judy Simpson. You are good sports!)

IMG_1846


Each group gave a presentation and shared the commerical. The Three Little Pigs took a long time because it was such a hard decision. They decided that House 5 was the perfect fit for them! The finale was using a leaf-blower on the houses. Believe it or not every house stayed intact! However, only one house stayed upright. It was a fun way to end the unit.

IMG_1875


I am HOOKED on project-based learning.  I know my students learned a lot and to see what they thought of the project, check out their blog post reflections on our kidblog.

Thanks for reading my first adventure into pbl! 🙂


Who’s Afraid of the Big, Bad Wolf ? part 4

I wrote several posts about my first adventure into project-based learning.  In case you missed them- Part 1, click here;  Part 2, click here, Part 3, click here.

Just a reminder of the project’s driving question:

As architects, what is the cheapest house we can build to protect the three little pigs from the Big, Bad Wolf?

Now came the part the kids were really excited about…BUILDING!  The material managers came with a list of supplies.  Some were shocked when they looked at the supplies realizing they were missing much needed materials.  One student looked at me and said, “I think our group is going to have to rethink this house plan.” After a few changes in design and recalculating the cost, the groups were ready to begin.

IMG_0382   IMG_0420


IMG_0384 

Once the houses were built, it was time for the “Big, Bad, Wolf test,” which was actually a hair dryer on high.  I had drawn a starting line to place the house.  The door had to face the hair dryer. I turned it on low  and then on high. The students had measuring tape (which is another CCS for math) to measure how far the house moved.  All the houses moved!  So the groups went back and planned a way to make the house stronger for test 2.  This also changed the house cost so they had to recalculate again.

Once the house was ready for “wind test” two, we repeated the test and if the house moved, they measured the distance from the starting line.  4 out of 5 houses  moved 0 cm on the second test!  The one house that moved went from moving 100 cm to only moving 8, which was still a great improvement.

This picture captures it all! They were so excited to see the results of the second wind test!

pbltest

Here are the 5 houses.  I love that they were very different from each other.

IMG_1862IMG_1863IMG_1864IMG_1865IMG_1866


Part 5, the final post, will be focused on sharing the houses with real estate agents, preparing for presentations for the Three Little Pigs, and also creating flyers and commercials.

One who sees the beauty in an educator that is able to be "reborn and grow again."

Skip to toolbar